Subject: Rear Dust Seal Installation Tool
[Back] [Return to Top of Forum]
| Tim *PloughNman* Daley(MI) |
Posted 01-04-2016 at 08:41:23 [URL] [DELETE]
[Reply] [Email] About 12/13 years ago I was replacing my 8N rear drag link seals and decided to make a replica of the KR WILSON Installation Tool -see photo. It works perfectly and won't damage the leather or rubber. I made it out of H13 tool steel so it is tough stuff. One thing we may be able to do on the new TOOLS forum is offer to lend/lease some of these 'specialty tools' many of us have made like this one. Donations to the NTC could be made instead of a rental fee but we can leave that up to the renter. Of course the understanding is too if you break it you bought it. Details can be worked out between the two parties involved that way the NTC won't be held responsible or get involved other than offering a place that members can meet and search for solutions to their projects. Just spitballing and thinking out loud here... Tim *PloughNman* Daley(MI) 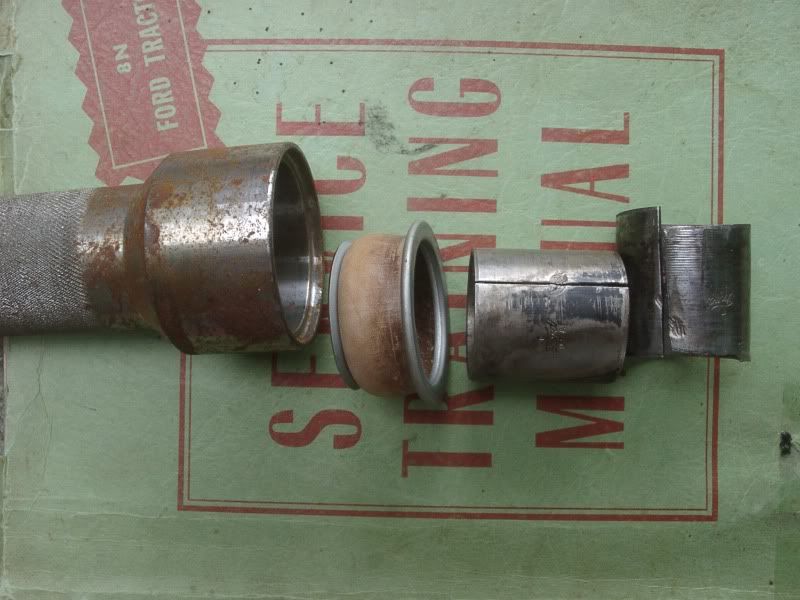 |
|---|---|
| Tyler (MD) |
Posted 01-07-2016 at 05:19:05 [URL] [DELETE]
[Reply] [Email] "One thing we may be able to do on the new TOOLS forum is offer to lend/lease some of these 'specialty tools' many of us have made like this one. Donations to the NTC could be made instead of a rental fee but we can leave that up to the renter." Of course this statement would have to be discussed and voted on with the other admins. :-) I do like Ed's thought on this about the sharing culture of this club. How-to sounds like a great idea. Tyler |
| John (AL) |
Posted 01-06-2016 at 16:19:09 [URL] [DELETE]
[Reply] [No Email] An 1.25/1.5" double female pvc connector works, too. |
| John in Mich |
Posted 01-04-2016 at 21:00:11 [URL] [DELETE]
[Reply] [No Email] Between my English and metric deep well sockets I use them as they fit. Crude but works. |
| Tim Daley(MI) |
Posted 01-05-2016 at 14:04:22 [URL] [DELETE]
[Reply] [No Email] Yeah, I tried a large socket first but wasn't satisfied with the fit and didn't find one that was right. Not easy to hang onto while smacking with a BFH. Plus, didn't want to be banging on a socket with a BFH so decided to design and make my own from the KR WILSON picture. I actually made a few and gave all but one away to friends. Tim Daley(MI) |
| Ed Gooding (VA) |
Posted 01-04-2016 at 10:10:24 [URL] [DELETE]
[Reply] [Email] I think it would be more in concert with the sharing culture of this website to write a How-To on how to make your own, Tim. My 2-cents........Ed |
| Tim Daley(MI) |
Posted 01-06-2016 at 08:31:54 [URL] [DELETE]
[Reply] [No Email] HiYa Ed-
|
| Chuck a |
Posted 04-10-2016 at 12:11:01 [URL] [DELETE]
[Reply] [Email] I have solid works so if you can get me a drawing I can make the solid of it. Then a print. |
[Back] [Return to Top of Forum]